The Science of Winter Soil Protection
Bare soil is vulnerable soil. When left exposed over winter, heavy rain compacts the surface, wind blows away fine topsoil, and repeated freeze-thaw cycles tear delicate fungal networks (mycorrhizae) apart. Unprotected soil also leaves earthworms and beneficial microbes exposed to extreme temperatures.
By shifting from a "strip-it-bare" cleanup to a sustainable winterizing routine, you protect your soil investment:
- Prevent Nutrient Leaching: Heavy winter rain washes mobile nutrients like nitrogen deep out of reach. Organic mulches and cover crop roots trap these nutrients in place.
- Protect Microbe Habitats: Insulation keeps soil temperatures warmer longer into late autumn, extending active microbial activity.
- Reduce Spring Soil Compaction: A protective blanket prevents rain impact from forming a hard crust that hinders spring seedling emergence.
Sanitation and the "Chop and Drop" Method
Sorting spent plant material correctly prevents disease outbreaks next spring while protecting soil structure.
What to Remove: Diseased Material
Examine foliage closely before clearing. Any plants showing fungal or bacterial infection—such as powdery mildew on squash, late blight on tomatoes, or rust on beans—must be completely removed from the bed. Trash or burn diseased debris; home compost piles rarely reach the 140°F (60°C) sustained internal temperature needed to kill plant pathogens.
What to Keep: The "Chop and Drop" Technique
For healthy annuals like beans, peas, and peppers, clip the stems off right at soil level using sharp pruners instead of yanking the roots out. Leaving the root systems intact offers major soil benefits:
- Preserves Soil Channels: As roots decay over winter, they leave microscopic channels that improve spring aeration and drainage.
- Feeds Earthworms: Decaying roots provide a subterranean food source for worms and soil microbes.
- Nitrogen Retention: Legume roots (beans and peas) retain nitrogen-fixing root nodules that break down gradually to feed spring crops.
Sorting Tip: If you're unsure whether foliage is diseased or simply showing late-season age, inspect the stems. Yellowing leaves are normal seasonal decline; black lesions, fuzzy white mold, or slimy stem bases indicate disease that requires disposal.
Feeding and Armoring Soil with Organic Mulch
Once diseased debris is cleared and healthy tops are chopped, apply a 2- to 3-inch layer of organic mulch across bare soil areas. Mulch acts as a thermal blanket and slow-release nutrient source.
Recommended Winter Mulches
- Shredded Deciduous Leaves: Run dry autumn leaves over with a lawn mower to break them into coarse pieces. Shredded leaves stay in place better than whole leaves, which can mat down and block water flow.
- Clean Seedless Straw: Excellent for vegetable beds. Ensure you purchase clean straw rather than hay, which contains weed seeds that germinate in spring.
- Aged Finished Compost: Spreading a 1-inch layer of finished compost directly over beds before adding leaf mulch provides an immediate microbial boost.
Cover Crops: Plant a Living Soil Blanket
If garden beds sit empty for more than two months over winter, sow a winter cover crop (green manure) to actively build soil health.
Selecting the Right Cover Crop
- Crimson Clover: Fixes atmospheric nitrogen; ideal for beds intended for nitrogen-hungry spring crops like brassicas or lettuce.
- Winter Rye: Forms dense root systems that break up heavy clay soil and suppress winter weeds.
- Field Peas & Oats: A winter-kill combination that dies naturally under hard freezing temperatures, leaving a clean organic mulch layer behind for easy spring planting.
Sowing Timeline
Broadcast cover crop seeds 4 to 6 weeks before your area's average first hard frost. Rake seeds lightly into the top half-inch of soil and water thoroughly until established.
Leaving Winter Habitat for Beneficial Insects
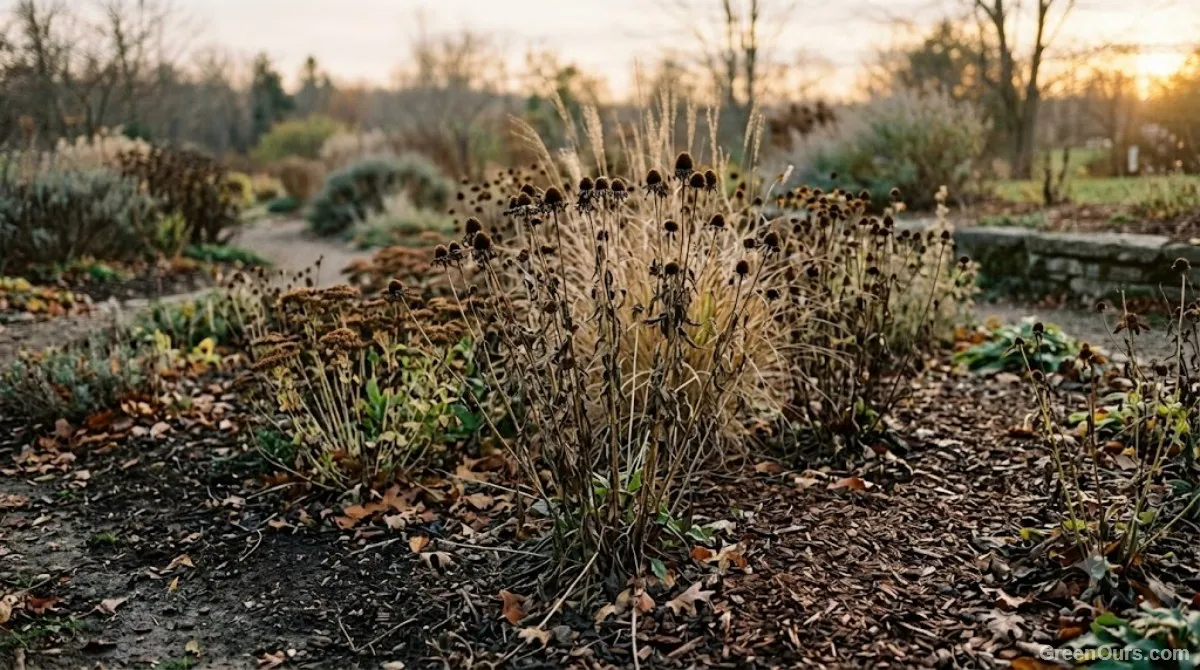
A perfectly manicured, cut-back garden starves native pollinators and beneficial pest predators. Ladybugs, green lacewings, predatory wasps, and native solitary bees overwinter directly in leaf litter and hollow plant stems.
- Leave Native Perennial Stems Standing: Leave hollow-stemmed perennials like coneflowers, bee balm, and sunflowers standing 12 to 18 inches high. Native bees nest inside the hollow stalks.
- Designate a Wild Corner: Leave a small section of leaf mulch and fallen twigs undisturbed along garden borders as winter shelter for beneficial beetles and toad habitats.
- Delay Spring Cleanup: Avoid cutting down standing perennial stems in spring until temperatures consistently remain above 50°F (10°C), allowing hibernating insects to emerge safely.
Regional Winter Adjustments: Hard Freeze vs. Mild/Wet Climates
Winter prep must adapt to your regional climate realities:
| Region / Climate | Primary Winter Threat | Key Preparation Step |
|---|---|---|
| Cold Northern Climates (Zones 3–6) | Deep ground freezing & frost heaving | Apply thick (3–4 inches) straw or leaf mulch after the first hard freeze to keep ground consistently frozen and protect roots. |
| Mild & Wet Climates (Zones 7–10) | Nutrient leaching & fungal rot | Avoid heavy water-retaining mulches against plant bases. Rely on cover crops and clear drainage paths to avoid standing water. |
| Windy / Exposed Sites | Soil erosion & desiccating winds | Anchor loose straw or leaf mulch with lightweight netting or fallen tree branches to prevent blow-away. |
Tool Sanitation & End-of-Season Maintenance Checklist
Finish your fall garden routine by protecting your tools and infrastructure:
- Clean and Disinfect Pruners: Scrub soil from pruner blades and wipe down with 70% isopropyl alcohol to prevent carrying fungal spores into next season.
- Drain and Store Hoses: Disconnect, drain, and roll up garden hoses before freezing temperatures split the rubber lining. Shut off outdoor water valves.
- Clean Seed Trays & Containers: Wash seedling flats and empty pots with warm soapy water to prepare them for spring seed starting.
Ready to plan your spring crop layout while your beds rest? Explore our full seasonal gardening guides.